In the world of strength training, few exercises command the respect—or induce the frustration—of the Romanian Deadlift (RDL). Often touted as the gold standard for posterior chain development, the RDL is the cornerstone for building thick, powerful hamstrings and glutes. Yet, despite its popularity, many lifters inadvertently sabotage their progress by treating the movement as a secondary afterthought, rushing through the setup in a frantic race to begin the "real work."
The reality, however, is that the RDL is not merely a matter of bending over with a loaded barbell. Without a meticulous, systematic approach to the setup, the movement loses its efficacy, shifting the load from the intended target muscles—the hamstrings and glutes—to the vulnerable structures of the lower back. To master the RDL, one must understand that the lift begins long before the first rep is initiated.
The Anatomy of a Flawless Setup: A Seven-Step Protocol
Professional strength coaches emphasize that a successful set is determined in the seconds before the barbell leaves the rack. By adopting a rigid, seven-step pre-lift checklist, lifters can ensure structural integrity, optimize biomechanical leverage, and maximize muscle recruitment.
1. The Geometry of the Rack Height
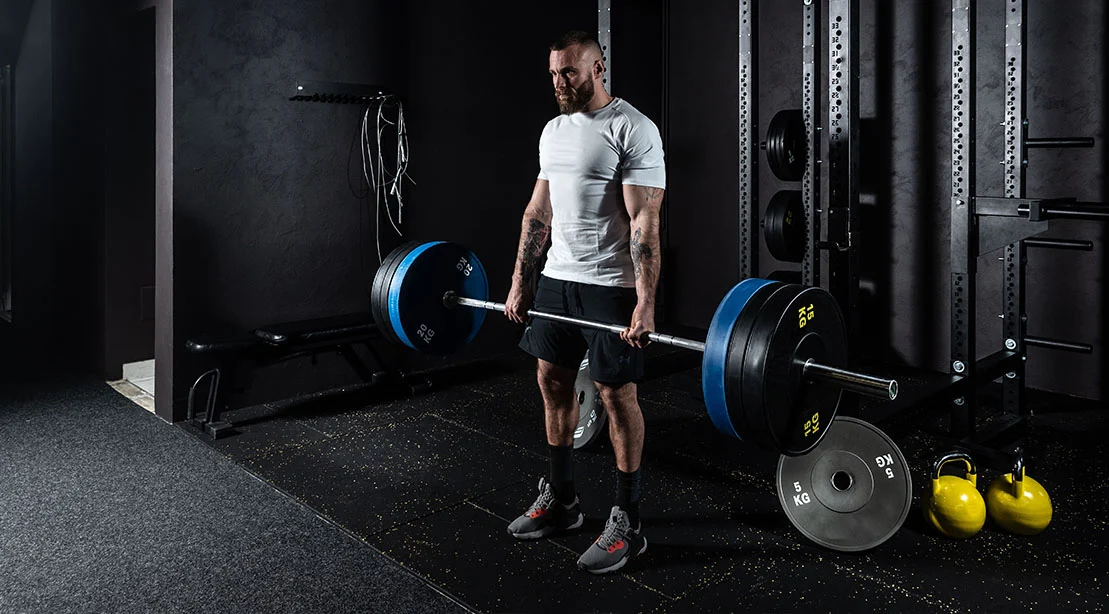
The process begins at the power rack. If the J-hooks are positioned incorrectly, the lifter is compromised before the weight is even held. The optimal rack height allows the athlete to unrack the bar with a slight, manageable bend in the knees. If the bar is too high, you risk unnecessary spinal strain; if it is too low, you essentially turn your first repetition into a partial deadlift, wasting precious energy. The goal is to clear the hooks smoothly, maintaining a neutral spine and an upright posture.
2. Establishing the Kinetic Foundation: Foot Stance
Stability is the prerequisite for force production. Your feet should be positioned approximately hip-width apart, with toes pointed forward or slightly angled outward depending on individual hip anatomy. The "tripod foot" concept is essential here: distribute your weight evenly across the heel, the base of the big toe, and the base of the little toe. By "screwing" your feet into the floor—creating external rotation tension—you engage the outer glutes, providing a stable platform for the hinge.
3. The Grip and Lat Connection
Your grip is the bridge between your nervous system and the external load. A double-overhand grip, with hands positioned just outside the thighs, provides the best mechanical advantage for the RDL. The barbell should rest low in the palm, keeping the wrists in a neutral, safe position. By "crushing" the bar, you create a ripple effect of tension that travels through the forearms, into the biceps, and ultimately into the lats.
4. The "Soft Knee" Mechanic
A common point of confusion is the degree of knee flexion. The RDL is not a stiff-legged deadlift, nor is it a squat. A slight "softening" of the knees—just enough to unlock the joint—is necessary to facilitate the hip hinge. Once this slight bend is established, it must remain static throughout the entire range of motion. Allowing the knees to travel forward during the descent shifts the bias toward the quads and turns the movement into a squat, effectively de-loading the hamstrings.
5. Locking in the Posterior Chain
With the bar gripped and the stance set, the lats must be fully engaged. Imagine you are trying to bend the bar around your shins or tucking your shoulder blades into your back pockets. This lat tension creates a rigid "shelf" for the bar to glide along, ensuring it stays flush against your legs throughout the eccentric phase.
6. The 360-Degree Brace
Bracing is the most frequently misunderstood aspect of lifting. It is not about sucking in the stomach; it is about creating intra-abdominal pressure. By breathing deeply into the belly, sides, and lower back, you create a cylinder of tension that protects the spine. A properly braced core acts as a rigid pillar, allowing the force generated by the hips to transfer efficiently without energy leaks.
7. Cervical Spine Awareness
The position of the head is the final piece of the puzzle. Many lifters crane their necks to stare at themselves in the mirror, which causes hyper-extension of the cervical spine. Conversely, burying the chin into the chest can disrupt the natural alignment of the upper back. The ideal position is a "neutral" gaze: allow your head to move in sync with your torso, keeping the neck long and the spine in a continuous, straight line.
Supporting Data: Why Technique Dictates Hypertrophy
Scientific literature in biomechanics consistently demonstrates that the RDL is superior to many other movements for targeting the eccentric phase of the hamstrings. However, this is only true if the tension remains constant. When the bar drifts away from the center of gravity—even by a few inches—the moment arm increases, placing exponential stress on the lumbar erectors.
Data shows that lifters who maintain a consistent bar path close to the shins achieve significantly higher EMG (electromyography) activation in the gluteus maximus and biceps femoris. When the setup is flawed, the body instinctively attempts to compensate, often resulting in a "rounding" of the shoulders or an arching of the back, both of which are precursors to injury.
Implications of Rushed Setup: The Risk of Inefficiency
The primary implication of a hurried setup is the "sucky set." When you skip the foundational steps, you are training your body to be inefficient. In the gym, efficiency is not just about speed; it is about the targeted application of stress to muscle tissue.
If you do not set your lats or brace your core, your body will seek the path of least resistance. This often means the lower back takes over the work that the glutes should be doing. Over time, this leads to chronic lower back fatigue, diminished returns on hypertrophy, and, in many cases, long-term spinal health issues. The time invested in a 10-second setup is a small price to pay for a lifetime of injury-free training.
Common Pitfalls and Expert Fixes
Even experienced lifters encounter plateaus in their RDL performance. Addressing these common errors is essential for breaking through to the next level of development.
- The Drift: When the bar moves away from the legs, you lose the hinge. The fix is simple: think "armpits to pockets." By actively engaging the lats to keep the bar pinned against your thighs, you keep the leverage in your favor.
- The Squatting Hinge: If you find your knees bending excessively, re-introduce the "freeze" cue. Once you unlock the knees at the top of the movement, imagine they are encased in concrete. They should not move for the duration of the rep.
- The Eccentric Rush: The "stretch" is where muscle fiber damage occurs, which is the precursor to growth. If you drop the weight quickly, you miss the benefits of the eccentric loading. Aim for a three-second descent.
- The Hyperextension Trap: At the top of the movement, the goal is to stand tall, not to lean back. Squeeze the glutes hard at the lockout, but avoid arching the lower back, which puts unnecessary shear force on the lumbar vertebrae.
Conclusion: Owning the Hinge
The Romanian Deadlift is an exercise in discipline. It is a movement that demands total focus from the moment you approach the bar until the moment you rack it. By mastering the seven-step setup, you are doing more than just perfecting your form—you are reclaiming the intended purpose of the exercise.
The transformation of your physique—the increased density in your hamstrings and the power in your glutes—will not come from the heaviest weight you can muscle through with poor form. It will come from the tension you create, the consistency you maintain, and the respect you pay to the setup. The next time you walk into the gym, stop, breathe, and remember: the set begins before the bar moves. Set the tension, own the hinge, and let the results follow.