In the high-stakes world of ultralight backpacking and alpine mountaineering, gear specifications often read like a technical manifesto. Manufacturers boast about denier counts, hydrostatic head ratings, and advanced laminates like Dyneema Composite Fabric or X-Pac. Consumers are frequently swayed by these impressive metrics, assuming that a pack constructed from "waterproof" fabric will keep their down sleeping bag dry during a torrential downpour.
However, there is a profound disconnect between the performance of a raw textile and the performance of a finished product. A backpack is not merely a piece of fabric; it is a complex assembly of seams, zippers, roll-top closures, hydration ports, and structural stitching. When these components are integrated, the "waterproof" nature of the fabric becomes secondary to the integrity of the system as a whole. To bridge this gap in consumer knowledge, industry experts have developed a standardized, repeatable methodology to assess the true water resistance of backpacks: the "Shower Test."
The Myth of the Waterproof Pack
The industry-wide misconception that "waterproof fabric equals a waterproof pack" is a significant point of contention for gear testers. While a fabric might boast a 20,000mm hydrostatic head rating—meaning it can withstand the pressure of a 20-meter column of water before leaking—this metric is rendered moot the moment a needle punctures the material.
Every stitch hole in a backpack is a potential conduit for moisture. Seams, which are often the weakest links in pack construction, act as capillary bridges for water. Even with seam taping or seam sealing, the mechanical stress placed on a pack—flexing, shoulder strap tension, and abrasion—eventually compromises these seals. Beyond the stitching, there are the "human-interface" points: zippers that provide easy access but invite water ingress; roll-top closures that can fail if not folded precisely; and hydration ports that often serve as direct funnels for runoff.
The "Shower Test" is designed to strip away the marketing jargon and expose how these various construction elements function in concert under duress.
Chronology of the Testing Methodology
The development of the standardized shower test evolved from a need for consistency. Historically, water-resistance testing was anecdotal—a "trail-tested" review based on a single rainy afternoon in the Cascades. While valuable, such reviews lack the repeatability required to objectively compare one brand’s construction against another’s.
Phase 1: The Witness Material Protocol
The methodology relies on a "witness material"—a large, dry cotton pillowcase. Cotton is chosen specifically for its high absorbency and its ability to clearly show moisture transitions. Before the test begins, the pillowcase is weighed to the gram.
Phase 2: The Controlled Saturation
The backpack is packed to a standard volume using soft goods (such as old clothing or sleeping bags) to provide structure. The witness pillowcase is placed inside the main compartment, positioned specifically against the areas deemed most vulnerable—typically the back panel, the base, or the primary closure.
Phase 3: The Shower Exposure
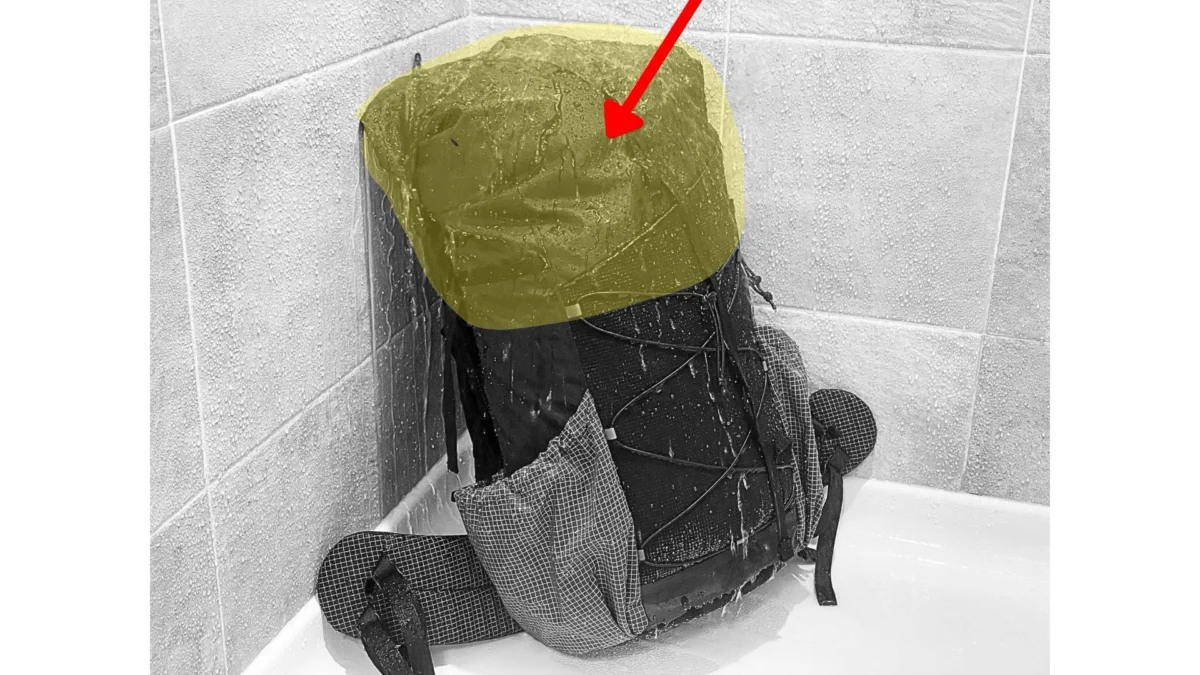
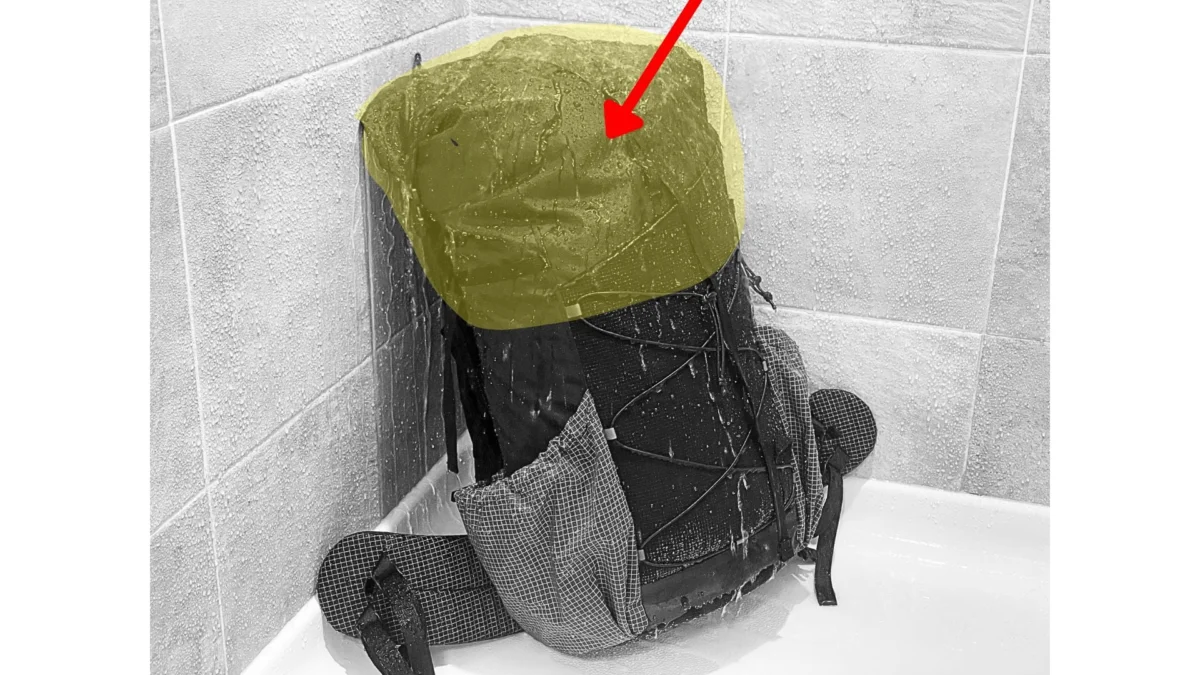
The pack is placed in a standard residential shower, positioned to receive a consistent, high-intensity spray for exactly 30 minutes. The orientation is adjusted to simulate the angle of wind-driven rain, ensuring that water is hitting the seams and closure mechanisms directly.
Phase 4: Post-Test Quantification
Immediately following the 30-minute window, the pack is wiped dry on the exterior. The internal witness pillowcase is removed and weighed again. The difference in weight provides a precise, quantitative measurement of water ingress.
Supporting Data: Why 30 Minutes Matters
The 30-minute duration is not arbitrary. It represents the "threshold of saturation." In the field, most gear failures occur not during a passing shower, but during sustained exposure where the external fabric reaches its saturation point and the DWR (Durable Water Repellent) finish fails. By maintaining a 30-minute high-intensity spray, the test forces the pack to deal with the cumulative weight of water that would typically only occur during hours of light to moderate rain.
Initial pilot studies using this method have revealed surprising data:
- The "Hydration Port" Vulnerability: Nearly 70% of packs tested showed the first signs of moisture entry at the hydration bladder port, an area often overlooked by designers when considering weatherproofing.
- Seam Failure: Packs with "internal" seams (folded and sewn) consistently outperformed packs with "exposed" edge-bound seams, regardless of the fabric used.
- The Closure Paradox: Traditional roll-top closures are highly effective, but only if the user executes the fold perfectly. Even a 5-degree misalignment in the fold can create a "channel" for water to drip directly into the pack body.
Official Industry Perspectives
The outdoor industry is currently divided on how to market water resistance. Major manufacturers often shy away from the term "waterproof" to avoid liability, opting instead for "highly water-resistant" or "weather-resistant."
During industry roundtable discussions, design engineers have noted that "true" waterproofing requires a level of manufacturing complexity—such as ultrasonic welding and RF (radio frequency) sealing—that significantly increases the price point of a pack. "To make a pack truly waterproof," one lead designer noted, "you have to eliminate almost all structural stitching. That changes the way we handle load transfer and ergonomics. It’s a trade-off between absolute dryness and the comfort of the carry."
These designers acknowledge that while the shower test is a "blunt instrument," it serves as a vital reality check for R&D teams. It forces designers to stop focusing on the "sexiness" of a new fabric and start focusing on the mundane, critical details of seam orientation and zipper flap geometry.
Implications for the Modern Backpacker
What does this mean for the person standing in an outfitter, trying to decide between two packs?
1. Shift Your Expectations
Stop looking for a waterproof backpack. Instead, look for a "weather-resistant" pack and supplement it with an internal waterproofing strategy. The most effective system remains a high-quality pack liner (such as a heavy-duty trash compactor bag or a dedicated roll-top dry bag liner).
2. The "Repairability" Factor
The shower test highlights that no construction is permanent. As a pack ages, the seams will naturally degrade. A pack that is easy to field-repair—using seam sealer or patches—is inherently more "water-resistant" over the long term than a highly complex, sealed pack that cannot be serviced once the factory tape begins to peel.
3. Understanding Your Environment
If you are planning to traverse environments with sustained, heavy precipitation, prioritize packs with fewer external zippers and simpler, roll-top designs. If you are hiking in arid, high-altitude climates, the weight-saving benefits of thinner, less-water-resistant fabrics may outweigh the need for heavy-duty sealing.
Conclusion: The Path Forward
The shower-based assessment method is not an end-all-be-all solution, but it represents a maturation in how we evaluate outdoor gear. By moving away from anecdotal "trail impressions" and toward a repeatable, data-driven methodology, the backpacking community can demand more accountability from manufacturers.
Water resistance is not a static property of a fabric; it is a dynamic performance metric of a system. As we push further into the backcountry, understanding the limits of that system is just as important as the gear itself. The next time you are caught in a downpour, remember: the fabric may be holding up, but the battle is being won or lost at every stitch, every zipper, and every seam. Knowing where those lines are drawn is the first step in ensuring your gear—and your morale—stays dry when it matters most.