The landmine press is a staple in the arsenals of strength coaches, physical therapists, and elite athletes alike. It is heralded for its ability to build shoulder stability, core strength, and overhead pressing mechanics without the extreme spinal loading of a traditional barbell overhead press. However, the "half-kneeling" variation is often misunderstood. While it appears to be a simple, accessible exercise, the technical nuances of the setup determine whether the movement becomes a transformative tool for athletic development or a frustrating struggle against the mechanics of the barbell.
The reality is that there is more to the landmine press than meets the eye. Success is not found in the weight on the bar, but in the precision of the setup. From the orientation of your knees to the specific placement of your grip, every detail influences the efficacy of the movement. When you dial in these variables, you build bolder, more resilient shoulders. When you ignore them, you spend the entire set fighting the bar instead of lifting it.
Main Facts: Understanding the Mechanics
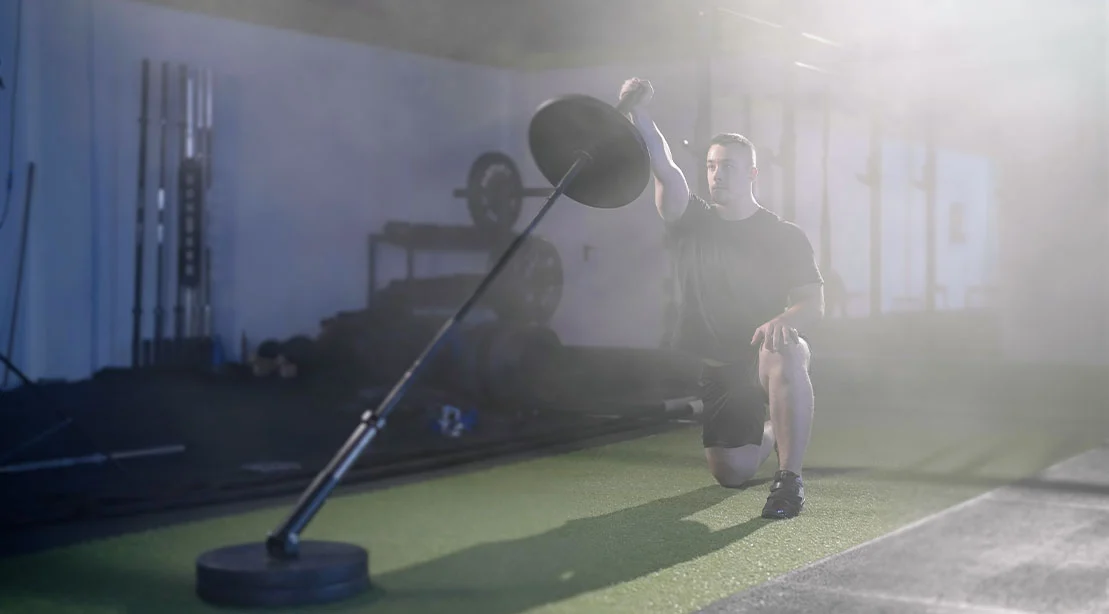
The half-kneeling landmine press is fundamentally a diagonal pushing exercise. Unlike a vertical overhead press, the landmine trajectory travels in an arc. This unique path requires the shoulder blade to move more naturally through its upward rotation, making it a "shoulder-friendly" alternative for those with limited mobility.
However, the "half-kneeling" position reduces your base of support. By placing one knee on the ground, you remove the legs as a primary source of stability, forcing the core—specifically the obliques and deep abdominal stabilizers—to manage rotational forces. If your setup is flawed, these forces dissipate, leading to energy leaks that rob you of power. There is no "one size fits all" setup; limb length, hand size, and the specific arc of your landmine attachment necessitate a customized approach for every athlete.
Chronology: A Step-by-Step Execution Guide
To maximize the benefits of this movement, you must follow a methodical, chronological setup process.
Step 1: Strategic Knee Selection
Which knee goes down? The choice between an ipsilateral (same side as the pressing arm) or contralateral (opposite side of the pressing arm) stance is more than just a preference.
- Contralateral Setup: This is generally the recommended starting point. By placing the opposite knee down, you create a diagonal line of tension that challenges the core to resist rotation. It is the most common setup for building foundational stability.
- Ipsilateral Setup: This variation can feel more natural for some lifters, as it aligns the center of mass more directly under the load. However, it requires a higher degree of anti-lateral flexion.
- Coach’s Verdict: Start with the contralateral version. Once you have mastered the balance, experiment with both to see which allows you to drive the weight with the least amount of compensation.
Step 2: The Architecture of the Base
Your foundation begins at the floor. Place your front foot so that the ankle is directly beneath the knee, creating a 90-degree angle. Your back knee should be positioned directly under the hip.
- The Railroad Track Rule: Do not line your feet up as if walking a tightrope. This will make you unstable. Instead, create two parallel "railroad tracks" with your legs. This lateral width is essential for resisting the rotational torque of the barbell.
- Tension Cues: Squeeze the glute of the down-knee side. This creates a "long" hip flexor and stabilizes the pelvis. Feel the entire sole of your front foot—heel, ball, and toe—pressed firmly into the ground.
Step 3: Securing the Grip
The interface between your hand and the barbell is where most lifters fail.
- The Cupped Grip: Ideal for those with smaller hands or thinner sleeves. Cup the end of the bar in your palm, wrapping your fingers securely around the circumference.
- The Sleeve Grip: For those with larger hands, wrapping the fingers around the sleeve itself provides a more secure, locked-in feel.
- The Golden Rule: Regardless of the grip, your knuckles must face the ceiling. If your wrist is hyperextended (bent backward), you lose the structural advantage of the forearm. Your wrist should be stacked directly over your forearm to ensure power transfer.
Step 4: Optimizing Distance and Reach
If you are too close to the landmine pivot, you will crowd your own shoulder, forcing the elbow into an awkward, flared position. If you are too far, you will be forced to lean forward, which puts unnecessary strain on the lower back. You are seeking the "sweet spot" where your torso remains upright, and your ribs remain stacked directly over your hips.
Step 5: The Pressing Path
As you initiate the movement, your elbow should stay tucked slightly in front of your hand. The forearm should track the angle of the bar. Avoid the urge to "reach" at the top of the movement; instead, think of driving your shoulder blade forward and upward to complete the arc.
Step 6: The Final Brace
Before you move a single pound, inhale into your belly and brace your core as if preparing for a punch. Keep your "zipper" facing forward. This final check ensures you are not twisting your torso to accommodate the weight.
Supporting Data: Why Stability Matters
Research in kinetic chain efficiency suggests that the "leaky container" theory applies to all overhead movements. When the base (the half-kneeling position) is unstable, the brain subconsciously limits the output of the primary movers (the deltoids, pectorals, and triceps) to protect the spine.
By utilizing the cues mentioned above—specifically the "ribs over hips" alignment—you increase the intra-abdominal pressure necessary to lock the spine in a neutral position. This structural integrity allows the nervous system to "green light" the muscles to exert maximum force. Without this bracing, you are effectively trying to fire a cannon from a canoe.
Official Responses: Addressing Common Pitfalls
Professional strength coaches often point to four recurring errors that negate the value of the landmine press:
- Improper Distance: The most common culprit for poor form. Being too close leads to an arched back (rib flare), while being too far leads to excessive forward leaning.
- The "Hyperextended" Wrist: Forcing a grip on a sleeve that is too thick often leads to wrist pain. If your wrist is bent, you are wasting energy. Switch to a cupped grip if necessary.
- Ignoring the Glutes: Many lifters treat the "down knee" as merely a balance point. It is actually a power source. Failure to squeeze the glute on the kneeling side results in a shaky, disconnected movement.
- Lack of Tension: A common mistake is treating the setup as a passive transition. Every rep must be preceded by a "reset" where the athlete recalibrates their core tension and alignment.
Implications for Athletic Performance
The implications of mastering this setup extend far beyond the gym. By improving your ability to stabilize the torso while moving a load, you are directly enhancing your functional capacity for daily life and athletic competition.
For the average lifter, the half-kneeling landmine press serves as a diagnostic tool. If you cannot maintain a stable, braced position while pressing a moderate weight, it indicates a need for more direct core work and shoulder mobility training. For the athlete, it builds the unilateral stability required for movements like throwing, swinging, or sprinting, where the body must constantly resist rotational forces while generating force through the extremities.
The Final Rep: A Commitment to Detail
The half-kneeling landmine press is a deceptively simple exercise that rewards those who pay attention to the details. It is not just about moving the weight from point A to point B; it is about how you move that weight and the structural integrity you maintain throughout the process.
If you find yourself struggling with the movement, do not simply add more weight. Go back to the checklist. Ensure your base is wide, your glutes are firing, your ribs are stacked, and your grip is secure. Finding your optimal position is a process of trial and error, but the results—increased shoulder health, improved core stability, and enhanced pushing power—are well worth the investment. Your gains are waiting; all you have to do is set up correctly.